Building your first flow
Create a flow that summarizes a meeting automatically.
In this walkthrough you will create a flow that takes a meeting transcript and generates a summary. Once built, you can run it on any file or set it to trigger automatically.
Create a new flow
- Click Flows in the top navigation

- Click Create new flow
Understand the editor
The flow editor has three main areas:
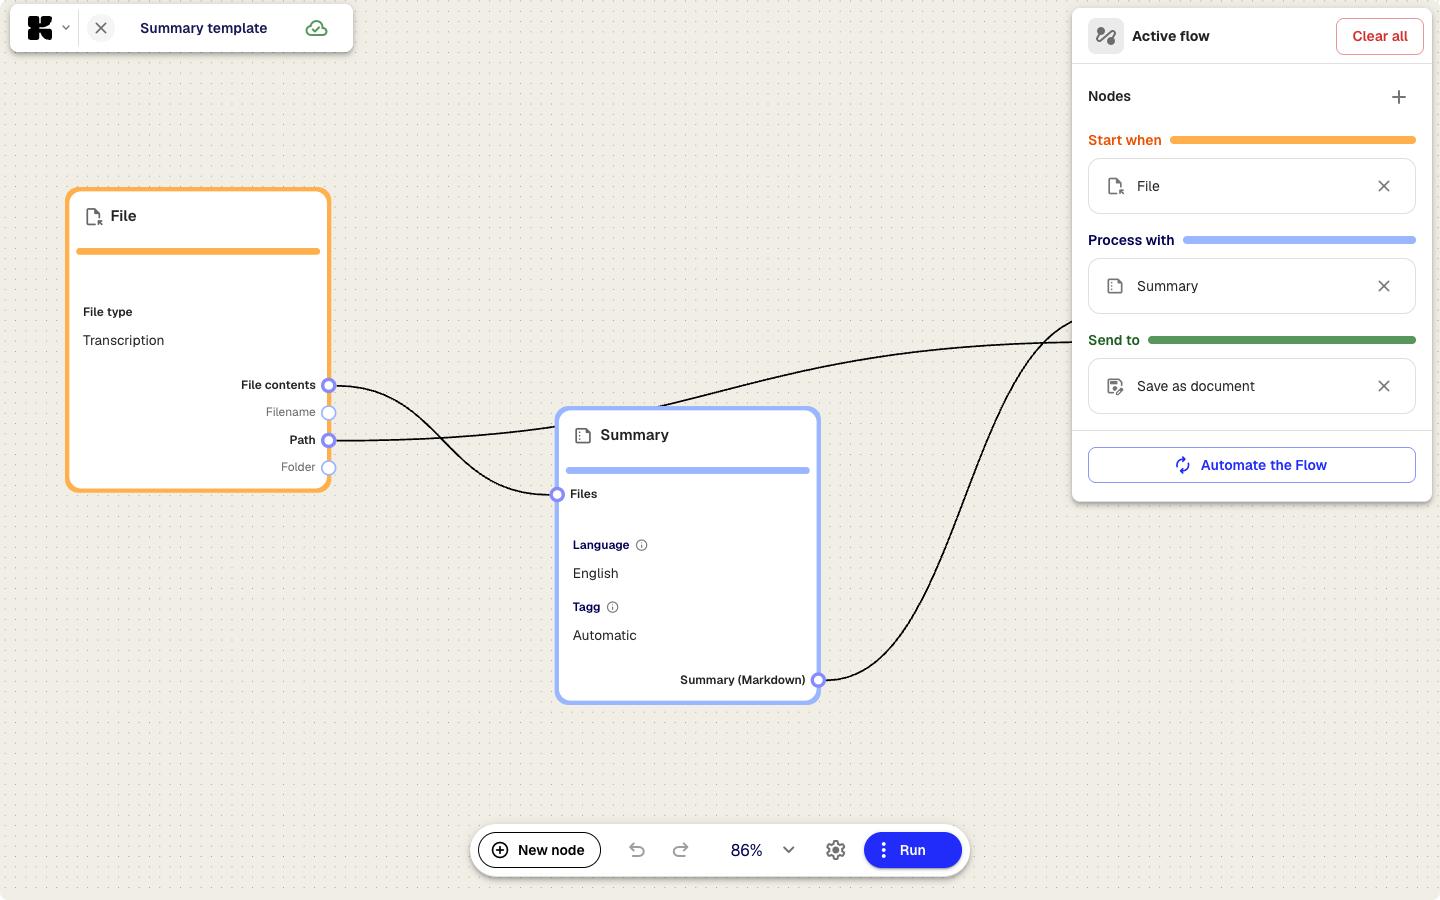
- Canvas (center) — Your nodes and the connections between them. Drag to pan, scroll to zoom.
- Bottom toolbar — Contains the New node button for adding nodes, undo/redo, zoom controls, and the Run button.
- Right sidebar — Shows the flow structure grouped by step: Start when, Process with, and Send to. Click a node here or on the canvas to configure it.
Changes are saved automatically as you work.
Customize a node
- Click any node on the canvas to open its settings panel
- Edit the fields — for example, in a summarization node you can change the prompt to focus on action items, decisions, or a specific topic
- Close the panel or click another node to move on
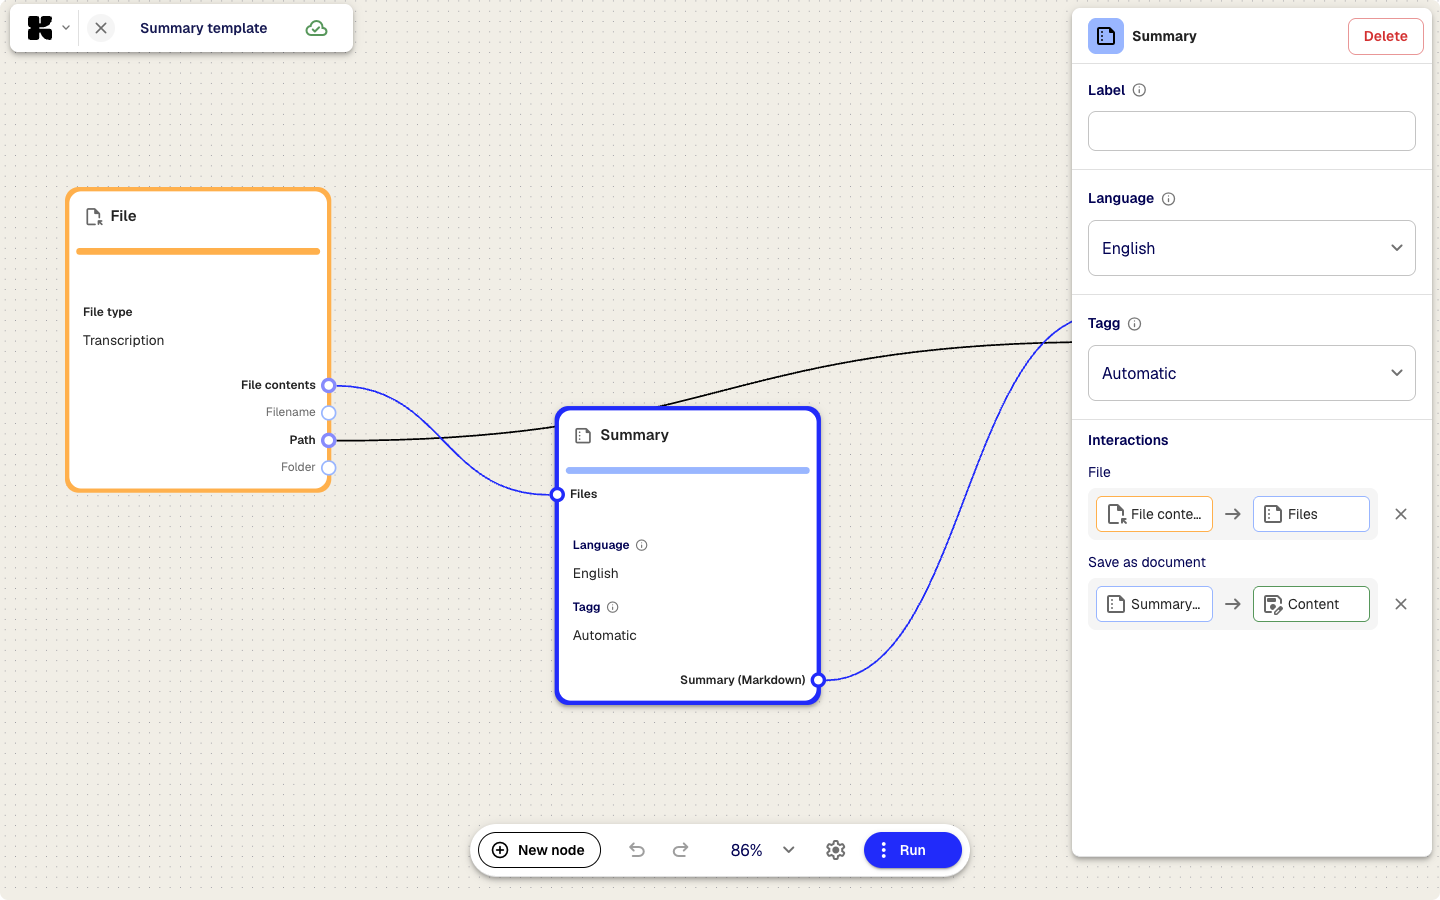
To add a new node, click New node in the bottom toolbar and choose a node type. Connect it to other nodes by dragging from one node’s output handle to another node’s input handle.
Run the flow
- Click Run in the top-right corner of the editor
- In the dialog, select a meeting or file as input
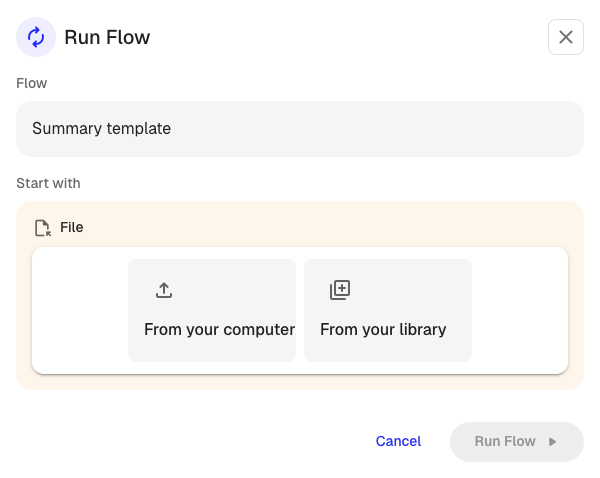
- Click Run
- Watch the progress on each node as the flow processes your file
- Review the result when the flow finishes
If the output is not what you expected, go back and adjust the node settings, then run again.
Set up a trigger
A trigger runs the flow automatically whenever new content matches your criteria.
- Click Automate in the flow editor
- Choose what should start the flow — for example, all new transcriptions, or files uploaded to a specific folder
- Optional: Filter by file type or folder
- Save the trigger
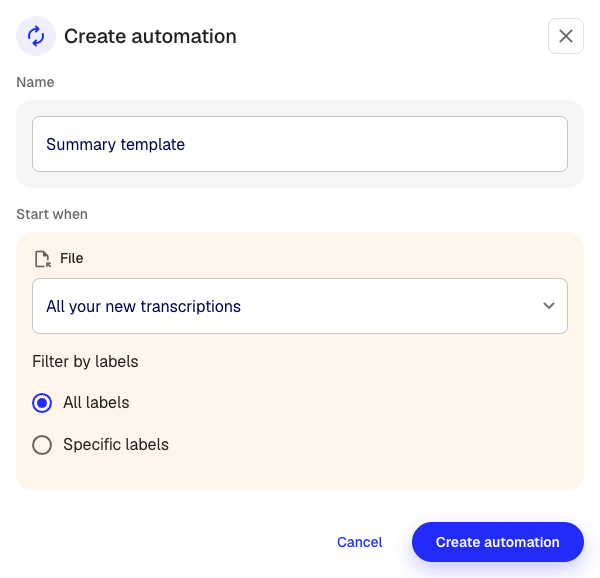
The trigger shows as active on the flows page. You can pause or resume it at any time.
Next steps
- Connect Google Drive to export flow results to your Drive
- Connect OneDrive to export flow results to OneDrive
- Manage your integrations to see all connected services
Was this article helpful?
Your feedback helps us improve our documentation.
Suggested Articles

Need more help?
Our support team is here to help you.