Your first transcription
Upload an audio or video file and get a full transcript with speakers.
Upload your file
- At the bottom of the sidebar, click Upload new
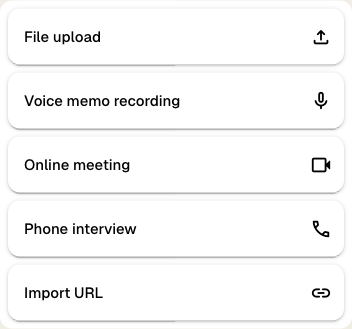
- Select File upload
- Drag and drop your audio or video file into the upload area, or click it to browse your computer
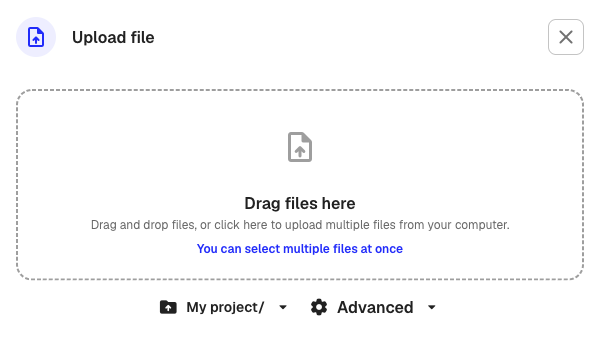
- At the bottom of the dialog, choose which folder to save the file in
- Click Upload
Klang accepts most common formats including mp3, wav, m4a, mp4, webm, and mov. The maximum file size is 10 GB.
Adjust transcription settings
Optional: Before uploading, click the Advanced button at the bottom of the dialog to change transcription settings.
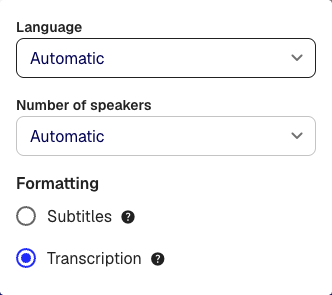
- Language: Set the spoken language, or leave on Automatic to let Klang detect it
- Number of speakers: Set the expected number of speakers, or leave on Automatic
- Formatting: Choose between Transcription (full transcript with speaker labels and longer segments) or Subtitles (shorter segments suited for subtitle display)
For most recordings, the default settings work well.
What happens during processing
After you upload, Klang processes your file automatically in several steps:
- Conversion: Your file is converted into a unified format for playback and transcription
- Transcription: Speech is transcribed with automatic speaker identification
- Post-processing: Spell checking and text formatting are applied
- Analysis: A summary of the recording is generated
You can close the browser while processing runs. Klang sends you a notification when your transcript is ready.
Read your transcript
Open the finished file from your folder. The transcript view shows each segment of speech with:
- Speaker labels: Each speaker is identified and shown with a colored dot and name
- Timestamps: Every segment shows when it was spoken, so you can jump to that point in the recording
- Audio/video player: Play back the original recording and follow along in the transcript
Click a timestamp to jump to that point in the audio player. The information panel on the side shows a summary of the recording, the list of speakers, and file details like duration and language.
Edit the transcript
- In the top-right corner of the transcript, click Edit
The header turns dark to indicate you are in edit mode.
- Click on any text in the transcript to correct words or fix spelling
- To rename a speaker, click a speaker label above a segment and either select an existing speaker or type a new name
- When you are done, click Exit editing
Your changes are saved automatically as you type.
Next steps
- Upload more files and explore all upload options
- Create an analysis to combine and analyze multiple transcripts together
Was this article helpful?
Your feedback helps us improve our documentation.
Suggested Articles

Need more help?
Our support team is here to help you.